
Winter break is here! Over the past few days, I’ve been jumping into the first difficult part of designing a 3D-printed plane: getting the wings light enough to fly. The original reason why I started over on designing the plane was to have a lighter and more simplified wing design, rather than a 36-piece screwed-together model that weighed almost 1kg (the entire plane together would have been around 2-3 kg (around 5 lb. for us Americans).
The new design, I decided, would fit directly into a slot in the main fuselage, that I would then glue strongly into place, rather than trying to screw things down haphazardly.
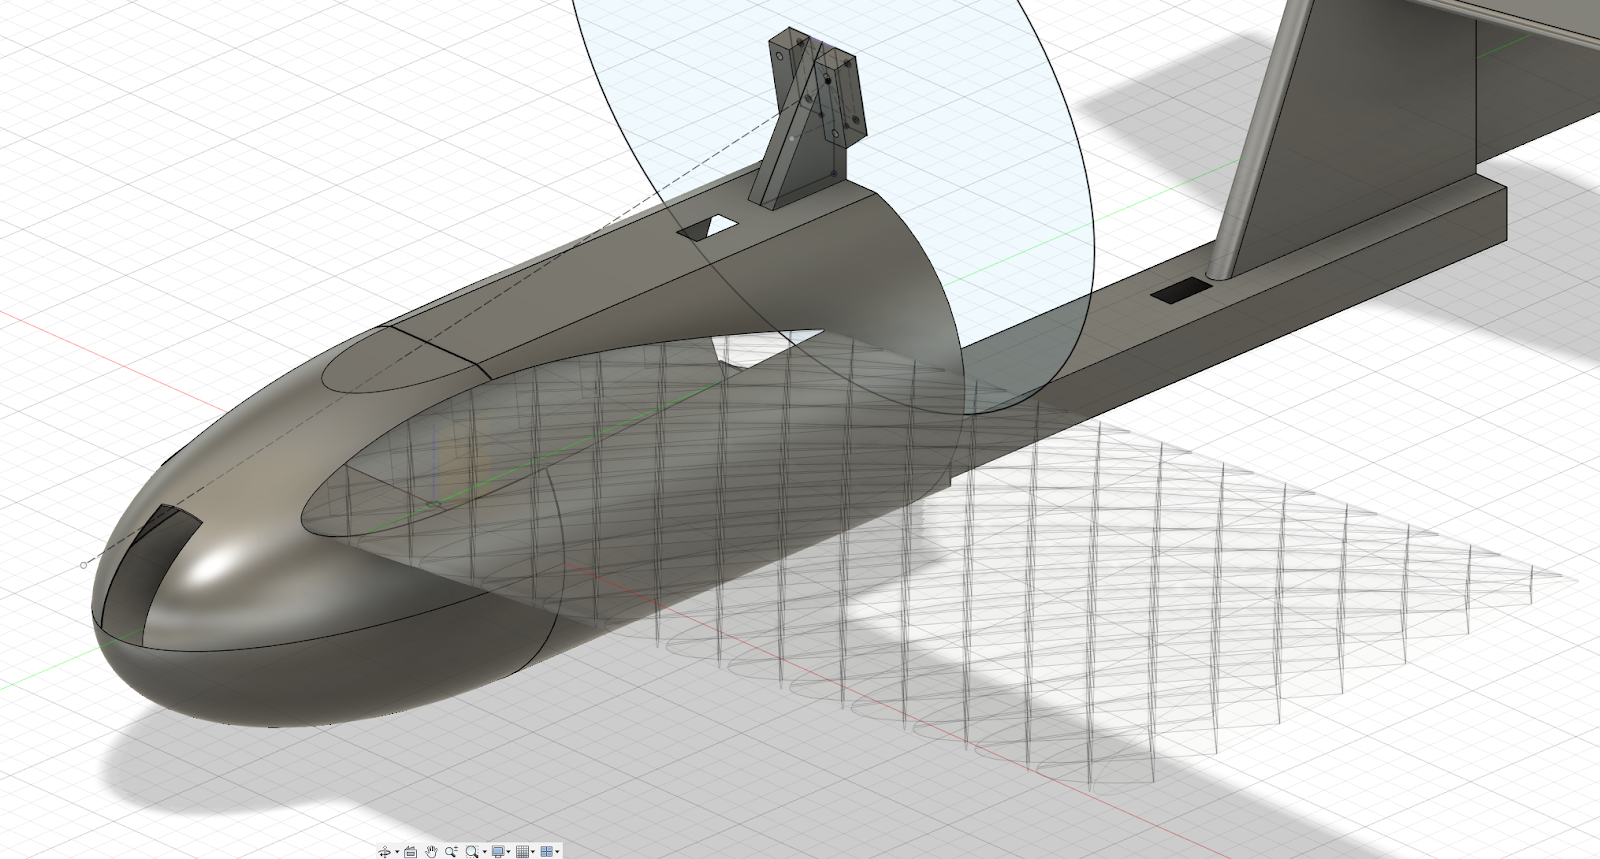
The above image is how the finalized design looks with the cross-hatched supports to make the aerofoil much stronger. This, however, was the result of about 6-8 hours of work.
I originally (naively) assumed that just one layer of filament, printed vertically, might be strong enough to make a decent aerofoil. How laughably wrong I was. Here are some pictures of the failed prints:

The first test printed successfully, but the very weak layer-lines resulted in the end result caving in on itself. It couldn’t even stand under its own weight, let alone remain rigid under any sort of force. Fail!

The second print was a bit sturdier, but I believe unstuck from the print bed, causing it to collide with the print nozzle and get shifted mid-print causing a shift artifact.
I then tried experimenting with the infill options in PrusaSlicer, but it didn’t give me enough freedom to choose the infill density. Densities of 5% or greater made the part much too heavy, while densities of less than 4% skipped entire layers in the infill pattern and I was very skeptical of its ability to stay strong/print without failure. TL;DR PrusaSlicer infill didn’t work well for this application, so I had to look elsewhere.
Dejected and out of original ideas, I looked to Youtube to see if anyone else had experience printing very light things out of heavy plastic. And I was blown away by the results. Not only had people printed light things, they had already made entire planes out of 3D printed parts. So I’m not the first one by a long shot! In fact, I am about 10 years behind the first steps in 3D-printed-plane-making.
I found a very helpful, detailed tutorial by 3D printer/aviation extraordinaire Tom Stanton on how to CAD and print a wing, but with your own infill CAD-ed rather than through the slicer: https://www.youtube.com/watch?v=QJjhMan6T_E
I wanted to use my own aerofoil outline (that I borrowed from the previous design) for the sake of originality, so I was jumping around a bit in the video. I also got a bit impatient, so I didn’t bother doing the second half of the tutorial with the circular holes in the supports. He mentioned that the holes for him only saved about 2% of extra weight, which would be about 8g for me (not worth more effort/risk of failed prints).
Even with the detailed explanation, it took me about 8 hours to get working. There were a couple key takeaways from my experimentation:
- If you’re following a tutorial, don’t try to jump around and improvise your own solutions to things, unless you know what you’re doing. Tom Stanton used a very clever technique by cutting out crosshatch-shaped thin cuts in the CAD model, and then tricking the slicer’s “spiral vase” mode into printing “borders” around the edges of the thin cuts–in the process making very thin lines in the form of the support shapes. I didn’t fully understand what he was doing, so I tried jumping ahead and caused myself a lot of unnecessary grief.
- For some reason I don’t fully understand mode, “spiral vase mode” has much better success with thin-walled prints than doing a 1-wall-thick print in normal print mode. Maybe it’s an extrusion thing with retractions?
- I had to edit my custom aerofoil to have it converge to a vertical line in the back, rather than a point. Otherwise, the midsegment cut that Tom Stanton describes in the video caused problems with the small cross-hatch cuts, which messed up the slicer… much unnecessary agony. Again, probably best to follow a tutorial all the way through than lifting specific segments out of it.


At last, here are some final result test-prints!! I was blown away by the results. Except in the very center of the square supports, the infill made the wing very strong and resistant to bending–more than my old wing design for Astro with its 6 parts per segment. Moreover, it was surprisingly light–my planned full wing would be about 25% lighter by length as the original blue wing. This, added to my plan to make the wingspan ~1.0m instead of 1.4m, would mean a full wing mass of around 400g instead of 800g from before.
However, before making a full, 195mm-tall wing segment, I had one final thing I wanted to push the limits on: print speed. For all my previous prints, I was extremely conservative on print speed, setting the slicer to print as slow as 15-20 mm/s for most parts of the print. This is kind of normal for PETG; online sources suggest no more than “60 mm/s”. That said, people on Youtube were talking about printing as fast as 100mm/s, so I wanted to push the printer to its limits to see how fast it could print a wing segment. If I continued printing everything at 20mm/s, the process would take abhorrently long: about 22 hours per 195 mm segment, or 4 days at best for a full wing. This simply wouldn’t do! So I doubled the print speed to 40mm/s and a small test piece (seen above) went perfectly. Determined to find where it would fail, I went all out and upped it to 120 mm/s, the fastest I’ve ever printed something. An hour later, I returned, astonished–it still printed perfectly (seen above). However, there were a few defects with the first layer where it was missing material, so I decided from now on I will play it safe at a solid 100 mm/s external perimeter speed (essentially everything), and a 15mm/s first layer speed.

Now, with the wings printing en masse, the next step is to focus on the electronics side of things. I’m excited to see what the SerialWombat 18AB has to offer! I was impressed by the SW4B. Now let’s just hope I can still solder well enough, LOL!
